


Configuring a Cloud Hosted SIP Server with Asterisk
Setting up your own SIP server may sound difficult at first, but with Asterisk on Ubuntu 26.04, it becomes much easier than you think. In less than an hour, you can build a working VoIP phone system for your office, home lab, or learning environment. Whether you want to create an internal office communication system, learn how voice communication works, or test a VoIP project, this guide will help you deploy your own PBX server step by step in a simple and practical way. 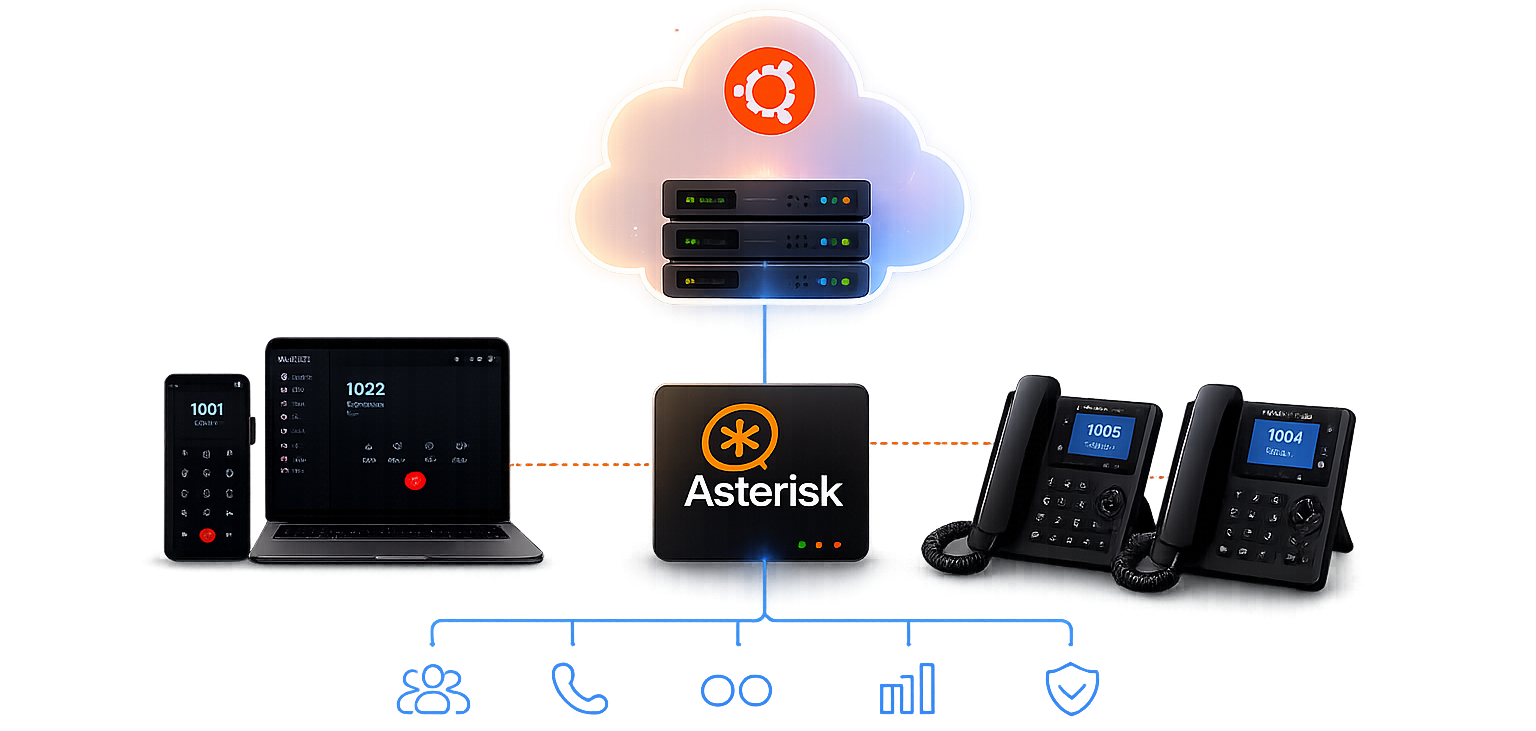 Session Initiation Protocol (SIP) is a communication protocol used to make voice and video calls over IP networks. In simple words, SIP helps devices connect and manage calls. It works like a call manager — starting calls, controlling call features, and ending calls when finished.
What You Need Before Starting
Before we deploy Asterisk PBX on Ubuntu 26.04, make sure you have the following requirements ready.
Server Requirements
- Ubuntu 26.04 Server A fresh installation of Ubuntu 26.04 LTS (Physical Server or Virtual Machine)
- Minimum Hardware Requirements (RAM: Minimum 1GB CPU: 1 Core or higher Storage: At least 10GB free space )
Access Permission
- Root or Sudo Access You should have root privileges or a user account with sudo access to install and configure Asterisk.
Basic Linux Knowledge
- Basic Understanding of Linux Commands Basic Linux command-line knowledge will help you follow this guide more easily.
Network Requirements
- Static IP Address or DDNS Setup Recommended if you want to access your PBX server from outside your local network.
SIP Client for Testing
- You need a SIP phone application or device to test calls after configuration. Recommended SIP Clients: 📱 Linphone ☎️ Zoiper 🖥️ SIP-enabled Desk Phone
Firewall 🔥 / NAT Configuration
- If your Asterisk server is behind a NAT router, If you're running this behind a NAT router, you'll need to forward UDP ports 5060 (SIP signaling) and 10000-20000 (RTP media) to your Asterisk server. We'll cover NAT configuration later in the article.
Step 1: Prepare the Ubuntu 26.04 System
Before installing Asterisk PBX, it is recommended to update your system packages. This helps install the latest security updates and required dependencies.
Update Package Repository
Run the following command to update the package list:
bash sudo apt updatesudo apt upgrade -yNote: This process may take a few minutes depending on your internet speed and server performance. Reboot the Server (Recommended) If the system installs a kernel update, reboot your server to apply the changes:
bash sudo rebootStep 2: Install Asterisk on Ubuntu
Ubuntu repositories include Asterisk, making the installation process simple and quick. Run the following command to install Asterisk:
sudo apt install asterisk -yThis command will download and install the Asterisk PBX package along with the required dependencies. Verify the Installation After installation check whether the Asterisk service is running:
sudo systemctl status asteriskIf Asterisk is running correctly, you should see the service status as active (running). Note: The Asterisk version available in Ubuntu repositories may not always be the latest version. However, the repository version is stable, receives security updates, and is suitable for both learning and production environments. You have now successfully installed Asterisk on Ubuntu.
Check Asterisk Service Status Run the following command:
sudo systemctl status asteriskIf everything is working properly, you should see the service status as: text active (running)
If the service does not start, you can check the logs for error messages using:
bash sudo journalctl -u asterisk -n 50 Access the Asterisk CLI
To confirm that Asterisk is working correctly, connect to the Asterisk Command Line Interface (CLI):
sudo asterisk -rvvv Once connected, you will see the Asterisk console prompt. To check the installed version, run:
core show versionAfter verifying the installation, exit the console using:
exit Understanding Asterisk Architecture
Before starting the configuration, it is important to understand how Asterisk processes calls. When a call is made, Asterisk follows a simple process to handle and route the call. 
How This Works
- sip.conf → Defines SIP users, devices, and authentication details.
- Channel Driver → Handles SIP communication between devices and Asterisk.
- extensions.conf → Controls what happens when a user makes a call. This is called the Dialplan
- Applications → Executes actions such as calling another extension, voicemail, or IVR menus.
- Destination → Sends the call to another SIP user, external phone number, or service.
Step 3: Configure SIP Endpoints
The `sip.conf` file is used to define SIP endpoints, such as users and devices that can connect to your Asterisk server. To edit the SIP configuration file run the following command:
bash sudo nano /etc/asterisk/sip.conf [general]
context=default ; Default context for incoming calls`
allowguest=no ; Disable anonymous calls for security`
udpbindaddr=0.0.0.0 ; Listen on all interfaces
tcpenable=no ; Disable TCP (UDP is standard for SIP)
transport=udp ; Use UDP transport
disallow=all ; Start with no codecs allowed
allow=ulaw ; Enable μ-law codec (North America standard)
allow=alaw ; Enable A-law codec (International standard)
allow=gsm ; Enable GSM codec (good for low bandwidth)Now add your first SIP user. Scroll to the bottom of the file and add:
[1001]
type=friend             ; Can make and receive calls
host=dynamic            ; IP address can change (typical for soft clients)
secret=SecurePass123!   ; Authentication password
context=internal        ; Which dialplan context to use
qualify=yes             ; Send keepalive packets to check availability
nat=force_rport,comedia ; NAT traversal settings
encryption=no           ; Disable SRTP for now (enable for production)

[1002]
type=friend
host=dynamic
secret=SecurePass456!
context=internal
qualify=yes
nat=force_rport,comedia
encryption=no
Security note: Replace the example passwords with strong, unique passwords for each extension. In production, consider using SIP TLS (encrypted signaling) and SRTP (encrypted media).
Save and close the file (Ctrl+X, Y, Enter).
Step 4: Configure the Dialplan The
Dialplan is one of the most important parts of Asterisk. It controls how calls are handled and routed inside your PBX system.
bash sudo nano /etc/asterisk/extensions.conf Add this basic dialplan that allows your two extensions to call each other:
[internal]
; Basic extension-to-extension dialing
exten => 1001,1,Dial(SIP/1001,20)  ; Ring extension 1001 for 20 seconds
    same => n,Hangup()              ; Hang up if no answer

exten => 1002,1,Dial(SIP/6002,20)
    same => n,Hangup()

; Echo test - useful for troubleshooting
exten => 110,1,Answer()
    same => n,Playback(hello-world) ; Play a test sound file
    same => n,Echo()                ; Start echo test
    same => n,Hangup()

; Extension status check
exten => 111,1,Answer()
    same => n,SIPShowPeer(1001)    ; Show status of extension 1001
    same => n,Hangup()
Understanding the Dialplan Syntax
[internal] - Context name, matching what we set in sip.conf
exten => 6001,1,Dial(...) - When someone dials 6001, execute priority 1: Dial the SIP endpoint
same => n,Hangup() - Priority "n" means "next", cleaner than numbering each line
Dial(SIP/6001,20) - Ring the endpoint for 20 seconds before timing out
Advanced Dialplan Features
Once your basic extension-to-extension calling is working, you can improve your PBX system by adding advanced dialplan features. Here are some useful features you can try:
[internal]
; Previous basic extensions...

; Call forwarding example
exten => *92,1,Answer()
    same => n,Read(FORWARD_TO,vm-enter-num-to-call)
    same => n,Set(DB(forward/1001)=${FORWARD_TO})
    same => n,Playback(call-fwd-on)
    same => n,Hangup()

; Check if extension has call forwarding set
exten => _100X,1,GotoIf($[${DB_EXISTS(forward/${EXTEN})}]?forwarded:direct)
    same => n(direct),Dial(SIP/${EXTEN},20)
    same => n,Hangup()
    same => n(forwarded),Dial(SIP/${DB(forward/${EXTEN})},20)
    same => n,Hangup()

; Conference room
exten => 1000,1,Answer()
    same => n,ConfBridge(1)        ; Join conference room 1
    same => n,Hangup()
Applying Configuration Changes
After editing configuration files such as `sip.conf` or `extensions.conf`, Asterisk will not automatically detect the changes. You need to reload the configuration manually. There are two common ways to apply changes:
Option 1 - Full restart (safest for initial setup):
sudo systemctl restart asteriskOption 2 - Reload specific modules (faster, no dropped calls):
sudo asterisk -rx "sip reload"
sudo asterisk -rx "dialplan reload"
Verify there are no configuration errors:
sudo asterisk -rx "sip show peers"You should see your configured SIP extensions, such as 1001 and 1002, listed in the output.
Configuring NAT Traversal
If your Asterisk server is behind a NAT router (common in home or office networks), additional configuration is required to allow SIP devices to connect properly from outside the network. Open the `sip.conf` file again:
sudo nano /etc/asterisk/sip.confAdd these lines to the [general] section:
externip=YOUR.PUBLIC.IP.ADDRESS  ; Your router's public IP
localnet=192.168.2.0/255.255.255.0  ; Your internal network range
nat=force_rport,comedia
If you're using dynamic DNS instead of a static IP:
externhost=your-domain.ddns.net
externrefresh=10
Forward these ports on your router to your Asterisk server's internal IP:
UDP 5060 - SIP signaling UDP 10000-20000 - RTP media streams (adjust range in rtp.conf if needed)
Step 5: Test Your SIP Server
Now it's time to test whether your Asterisk SIP server is working correctly. You need to install a SIP client (softphone) on your computer or smartphone to register with the Asterisk server.
Recommended SIP Clients
Linphone - Cross-platform, open source
Zoiper - Feature-rich with good codec support
MicroSIP - Lightweight Windows client
Configure your SIP client with these settings:
Username:	1001
Password:	SecurePass123!
Domain/Server:	Your Asterisk server IP
Transport:	UDP
Port:	5060
Username: 1002
Password: SecurePass123!
Domain/Server: Your Asterisk server IP
Transport: UDP
Port: 5060Once registered, verify from the Asterisk CLI:
sudo asterisk -rvvv
sip show peers
Try these tests:
- Dial 110 for the echo test—you should hear yourself with a slight delay
- Register a second client as extension 1002
- Call from 1001 to 1002 to test two-way calling
- While on a call, run core show channels in the CLI to see active call channels
Monitoring and Troubleshooting
When troubleshooting Asterisk issues, the Asterisk CLI is one of the most useful tools. It helps you monitor SIP registrations, call activity, and error messages in real time.
Open the Asterisk CLI
Run the following command:
sudo asterisk -rvvvvv # More v's = more verbosityUseful CLI commands:
sip show peers          # List all SIP endpoints and their status
sip show peer 6001      # Detailed info about specific peer
core show channels      # Active calls
dialplan show internal  # View dialplan context
sip set debug on        # Enable SIP message debugging
rtp set debug on        # Enable RTP stream debugging
Check logs for errors:
sudo tail -f /var/log/asterisk/full
sudo tail -f /var/log/asterisk/messages
Common issues and solutions:
Can't register Check firewall (ufw status), verify credentials, confirm Asterisk is listening on port 5060
One-way audio NAT configuration issue—verify externip setting and router port forwarding
Poor call quality Network bandwidth or codec mismatch—try different codecs, check with "sip show channelstats"
Calls disconnect after 30 seconds SIP ALG enabled on router—disable it in router settings
Security Hardening
Your Asterisk SIP server is now functional, but before exposing it to the internet, it is important to improve security to protect against unauthorized access and attacks. Follow these recommended security measures:
- Enable the firewall and restrict access:
sudo ufw allow 22/tcp       # SSH
sudo ufw allow 5060/udp     # SIP signaling
sudo ufw allow 10000:20000/udp  # RTP media
sudo ufw enable- Install and configure Fail2Ban to block brute-force attacks:
sudo apt install fail2ban -y
sudo systemctl enable fail2ban
sudo systemctl start fail2ban- Use strong passwords and consider certificate-based authentication for production environments.
- Disable unnecessary modules in
/etc/asterisk/modules.confto reduce attack surface.
What to Explore Next
You have successfully built your Asterisk SIP server on Ubuntu 26.04. Now it’s time to explore more advanced features and improve your PBX system.
- Configure Voicemail : Set up `voicemail.conf` and connect it with your dialplan.
- Enable External Calling (PSTN / Trunk) : Connect your PBX to a VoIP provider (SIP Trunk) to make and receive calls outside your internal network.
- Create IVR Menus : Build automated call menus
- Set Up Call Queues Create : Call Queues for support teams or call centers.
- Enable WebRTC Calling :Try WebRTC support to make calls directly from a web browser.
In this guide, we successfully deployed a basic Asterisk PBX server on Ubuntu 26.04, allowing SIP-based communication between extensions. However, this setup is only the starting point of what Asterisk can achieve. As you continue learning, you can expand your PBX by adding features such as voicemail, IVR menus, call queues, and SIP trunk integration for external calling. You can also explore WebRTC support to enable browser-based communication and integrate monitoring tools such as Grafana for real-time analytics and performance tracking.
For production environments, additional considerations such as security, scalability, high availability, and proper network design become important to ensure a stable and reliable system. The Asterisk community, official documentation, and user forums provide excellent resources for learning advanced configurations and troubleshooting. With practice and gradual improvements, you can transform a simple Asterisk installation into a powerful and professional communication platform.
Get the next practical update from OneAccess
We'll send focused training, certification, and enterprise IT updates connected to this article. Your details are sent to our CRM follow-up workflow and saved in the local lead queue.